If you’ve ever tried sending emails from Power Automate using the Outlook connector, you’ve probably realized one big limitation — those emails are not tracked in Dataverse.
So, if you ever need to know which record triggered which email, good luck searching your Outlook Sent Items — it quickly becomes a nightmare!
In this blog, I’ll show you how to:
- Use the Email Message entity in Dataverse to send tracked emails instead of Outlook.
- Send emails with file attachments fetched from SharePoint (yes, we’ll go deep — this is something you won’t find much about online).
Why Use “Email Message” Instead of “Send an Email (Outlook)”?
When you use the Email Message entity in Power Automate:
- Emails are tracked and visible in the Timeline of the related record (like Contact or Account).
- You can report on email activities directly in Dataverse.
- You can control delivery (send vs. hold) using the
IssueSendflag. - You can even use environment variables to manage behavior across Dev, UAT, and Prod.
So, if Dataverse is your source or trigger — always go with Email Message, not Outlook action.
Use Case
Scenario:
When a record (say, a Contact or Account) is modified, download a file from SharePoint and send an email to the client with that file attached — all through Dataverse.
And yes, the email will appear in the record’s timeline for complete visibility.
Step-by-Step Implementation
Step 1: Trigger — When a Record is Modified
Trigger your flow using the Dataverse connector:
- Table name: e.g.,
Contact - Scope: Organization
- Change type: Modified

Step 2: Initialize Variables and Compose Actions
Create:
- Array variable – to hold your party list (email recipients).
- String variable – to hold file content.
- Compose – to define or capture your SharePoint file path (this can be dynamic).

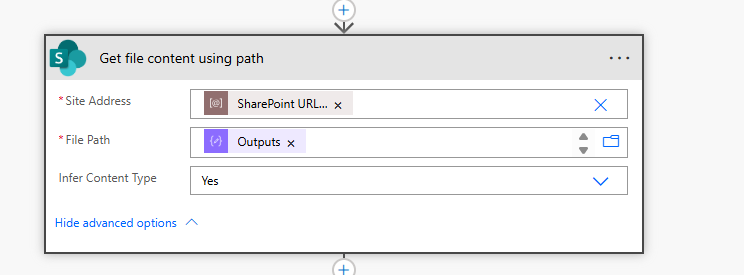
Step 3: Get File Content from SharePoint
Use the “Get file content using path” action:
- Site Address: (use environment variable)
- File Path: from your Compose output
✅ Tip: Using environment variables makes deployments across Dev/UAT/Prod easier.
Step 4: Get File Metadata
Use the “Get file metadata using path” action to fetch details like:
- File name
- Content type
- Size (optional, if you want validation)3
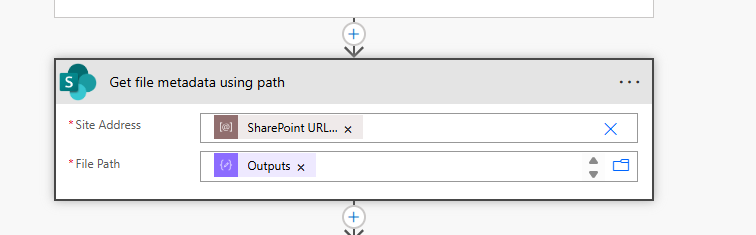
✅ Tip: Using environment variables makes deployments across Dev/UAT/Prod easier.
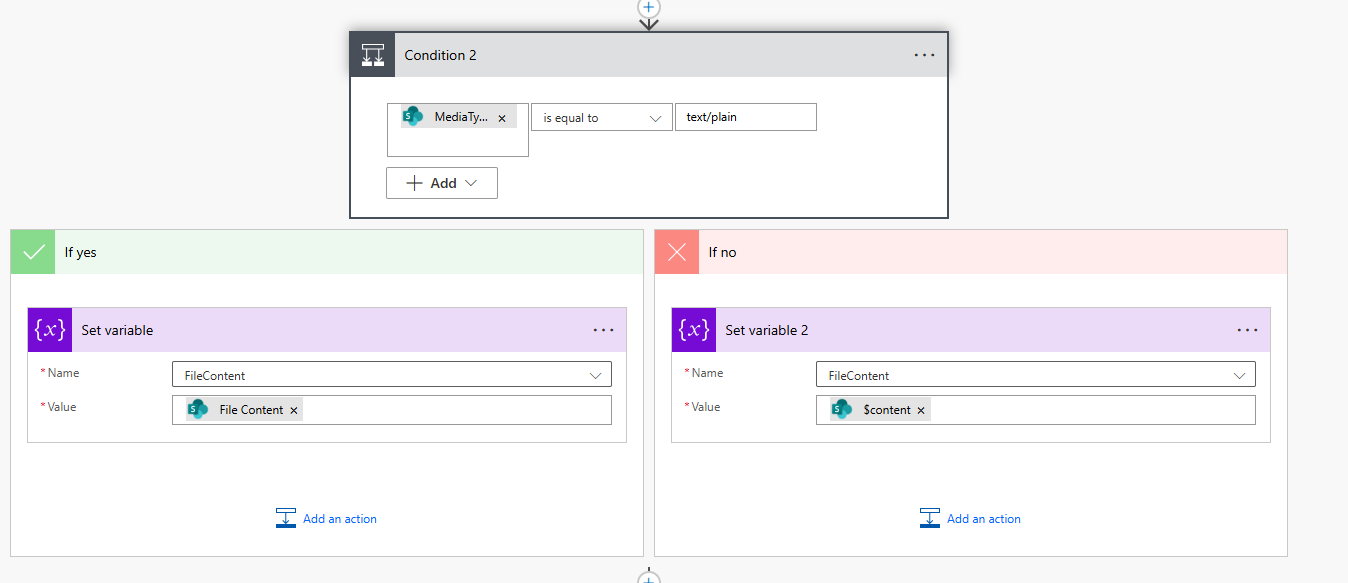
Step 5: Handle File Type (Text vs. Non-Text)
SharePoint behaves differently for text files — it doesn’t return Base64 for .txt, but plain text instead.
Add a Condition:
- If
Content-Type=text/plain, convert text to Base64. - Else, use the file content as is.
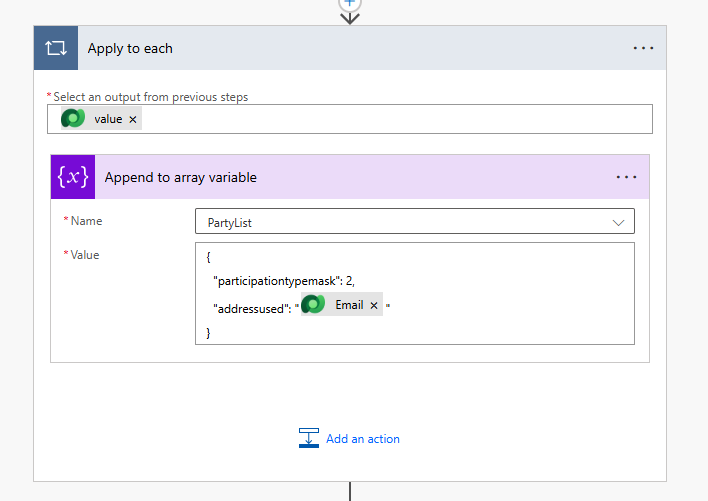
Step 6: Build the Party List (Email Recipients)
You can form a party list using contacts, users, or other activities.
If multiple recipients exist, loop through and append them.
Step 7: Validate Recipients
Add a Condition to check if the party list has records.
- If not → end the flow.
- If yes → move ahead.
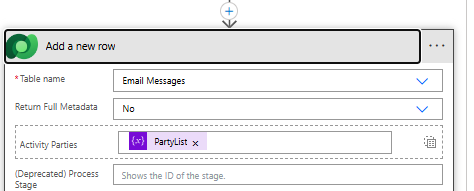
Step 8: Create an Email Message Record
Use Dataverse → Add a new row
- Table name:
Email Message - To: the party list array
- Subject: your email subject
- Description: email body
- Regarding: related Contact/Account
- Owner: modifying user or another owner
Step 9: Create an Activity File Attachment Record
Now, this is where things get interesting — and almost no one talks about it.
Use Dataverse → Add a new row
- Table name:
Activity File Attachment - Name: file name from Step 4
- Entity:
email(⚠️ not 4202objecttypecode– that fails)

Step 10: Create an Activity Mime Attachment Record
Use another Add a new row action:
- Table:
Attachment - Attachment:
null - Entity:
email Item (activities): Activity ID from Step 8activitypointers(@{outputs('Add_a_new_row')?['body/activityid']})Item (email message): Email Message ID from Step 8Activity Mime Attachment: GUID of Activity File Attachment Record (from Step 9)Body: Base64 content from Step 5File Name: File nameSubject: Optional (same as email subject or blank)

Step 11: Send the Email (Bound Action)
Finally, use:
- Action: Perform a bound action
- Table Name:
Email Message - Action Name:
Send Email - Row ID: Email Message Record ID
- Parameter:
Issue Send:true– sends the email immediatelyfalse– keeps email as “Pending Send” in Dataverse

Bonus Tip — Using Issue Send Smartly
The IssueSend flag is a great control switch:
- In Development/UAT, set it to
false— the flow will create email records but won’t actually send them. - In Production, set it to
true.
You can even manage this through an environment variable so that deployment doesn’t require changing the flow logic.
Just update the environment variable value to control sending behavior.
Benefits of This Approach
✅ Emails tracked in Dataverse (visible in the Timeline)
✅ Easier reporting on all communication activities
✅ Centralized visibility for business users
✅ Environment-aware sending controls
Final Thoughts
Using the Email Message entity in Power Automate gives you complete control and visibility — something you’ll never get with the Outlook connector.
Once you set this up, your emails become a part of your Dataverse data model — searchable, reportable, and auditable.
This approach is especially useful for regulated industries (like Pharma, Engineering or BFSI) where communication traceability is key.
Have you tried this approach? Or do you still rely on Outlook emails from your flows?
Let me know your experience in the comments — and stay tuned for my next post.
